No products in the cart.
What is Bleed in Graphic Design?
What is Bleed?
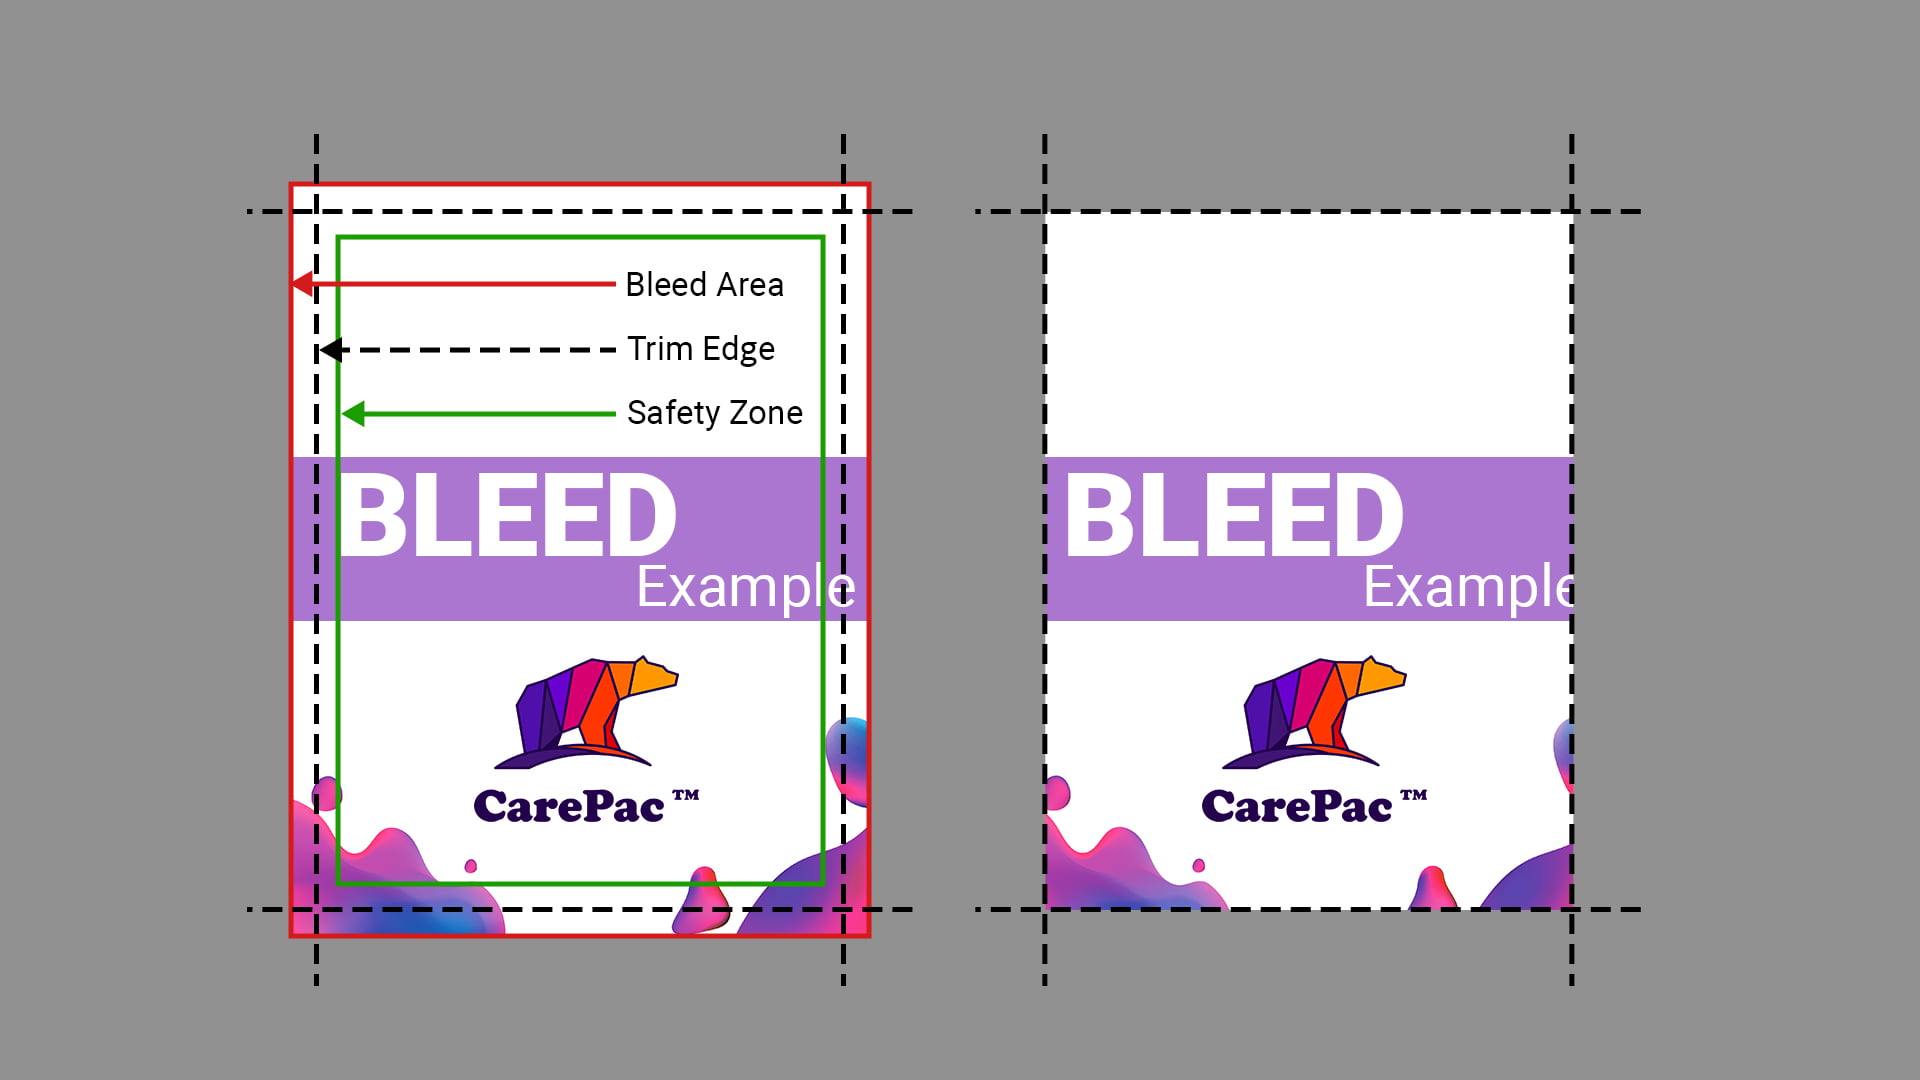
Bleed refers to the graphic design technique and/or printing process of running artwork to the very edge of a printed document. In doing so, the final printed materials will have elements, colors, and background images that run to the very edge of the page, effectively avoiding unsightly white borders, gaps, spaces, or margins. Many incorrectly assume that bleed elements negatively impact the final print, when in reality bleed is just a technique used by printers and graphic design teams that extends the imagery or background colors to the very edges of the final printed piece.
Adding a bleed margin during document setup is important in certain printing projects, like business cards, brochures, and posters, as the bleed ensures the color will extend fully across the sheet of paper. Full bleed printing allows for more precise trimming and can help prevent misalignment during the printing and trimming process.
If you're unfamiliar with this printing process, we'll walk you through the basics, including mistakes to avoid and how to set up bleed for the printing process.
Can flexible barrier packaging be printed full bleed?
Yes flexible barrier packaging, such as stand up pouches, and box bottom bags can be printed full bleed.
Is bleed important when designing stand up pouch art?
Typically very little bleed is needed for flexible packaging design files, if you do add bleed limit it to 5mm or less.
Setting Up Bleed for the Printing Process
If you want to properly design for full bleed printing during the graphic design stage (i.e., create a bleed line so the finished piece won't have any white space), here's how to add a bleed margin to your design in Photoshop, Illustrator, and InDesign:
Adding a Bleed Trim Line in Photoshop
1. Open Photoshop and click File > New
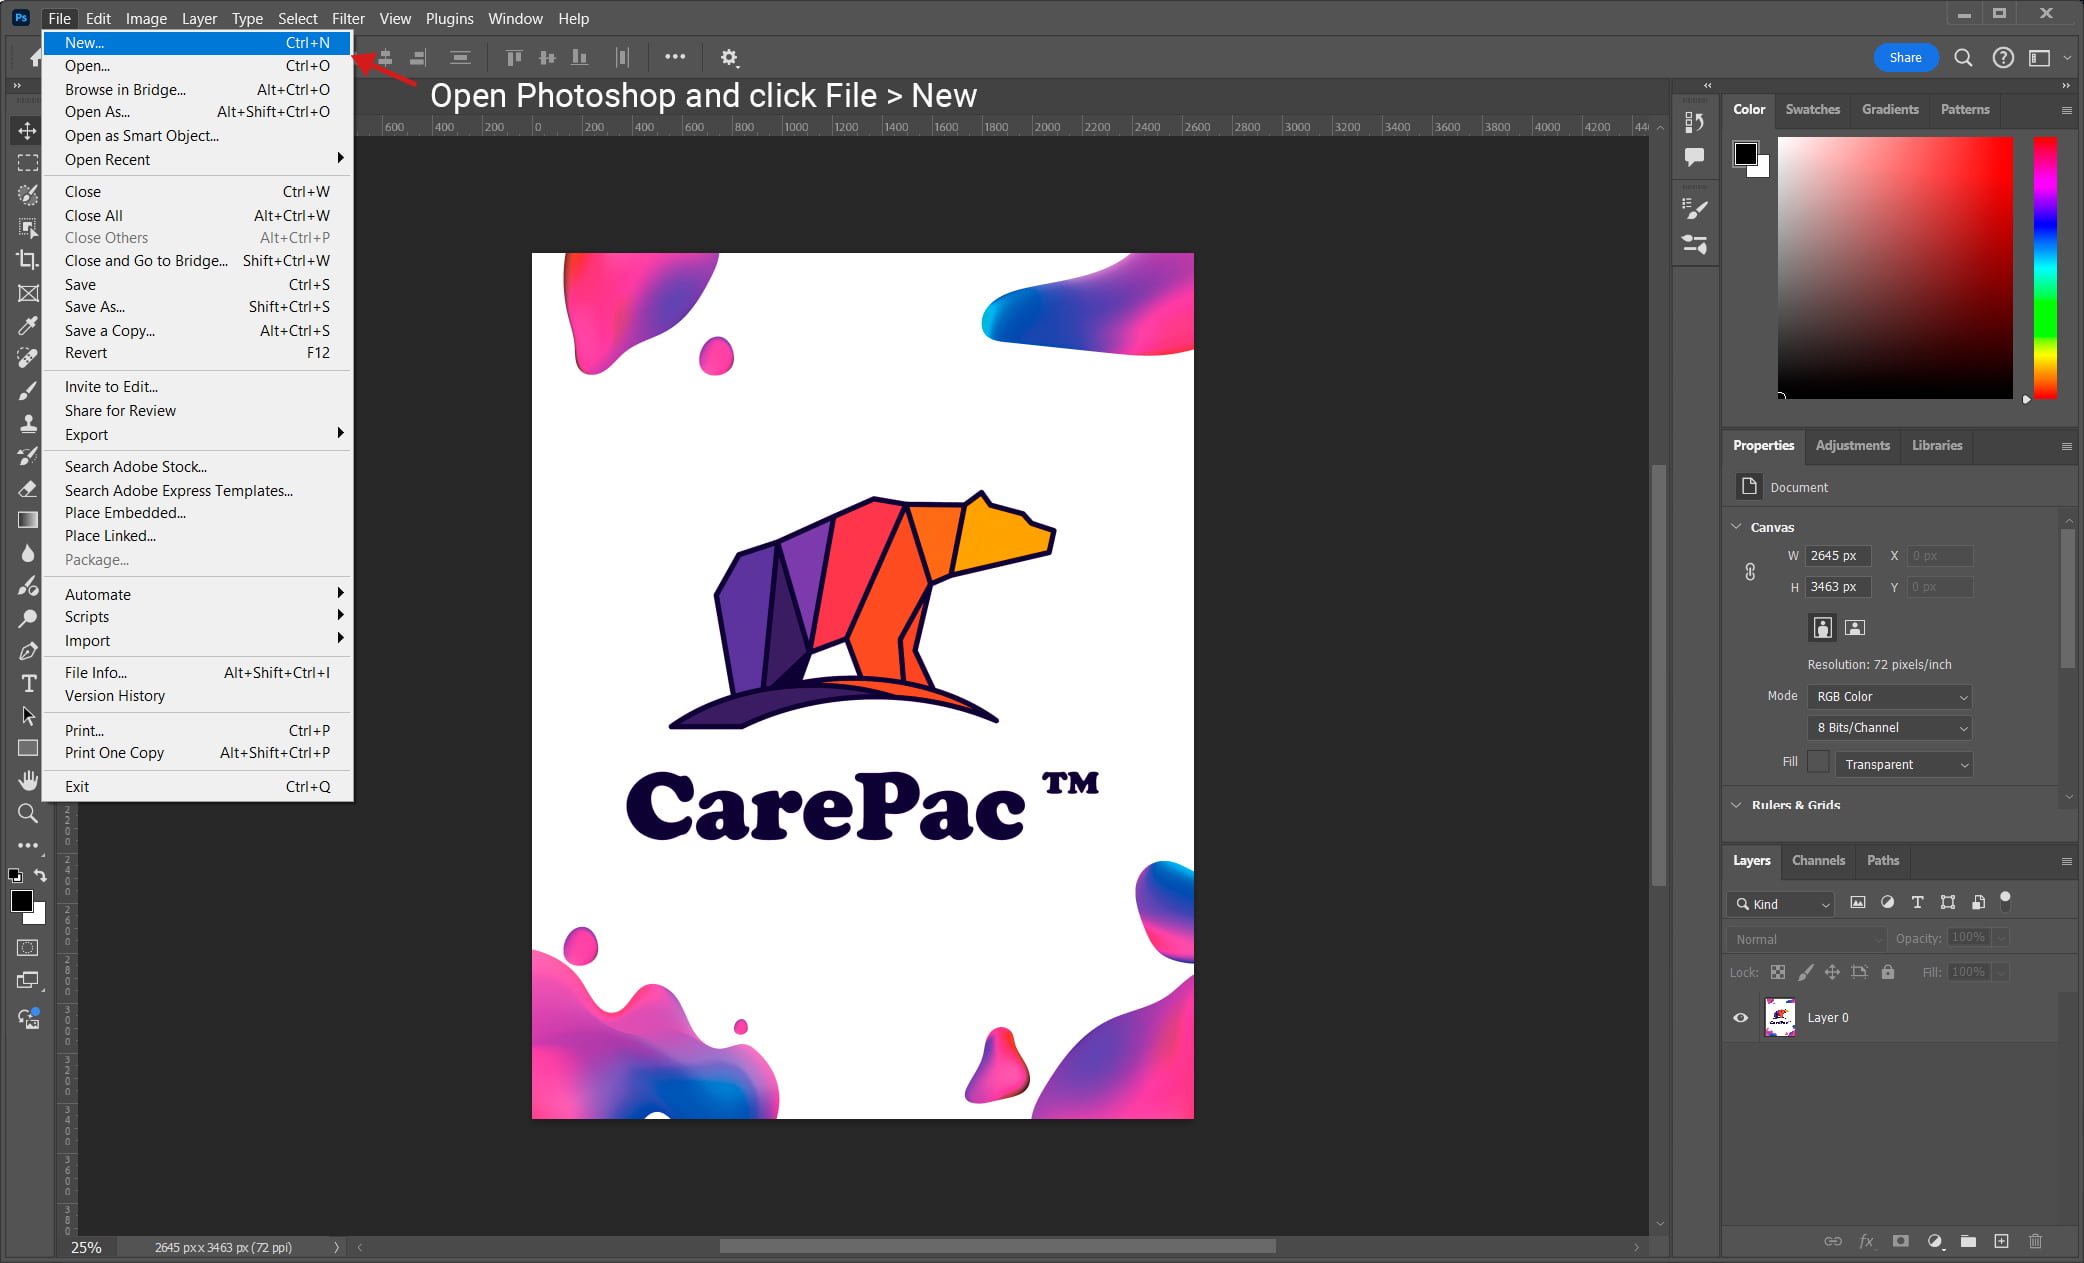
2. Enter the FULL BLEED dimensions. That is, 1/4" extra space both vertically and horizontally. This is often referred to as the "safety margin."
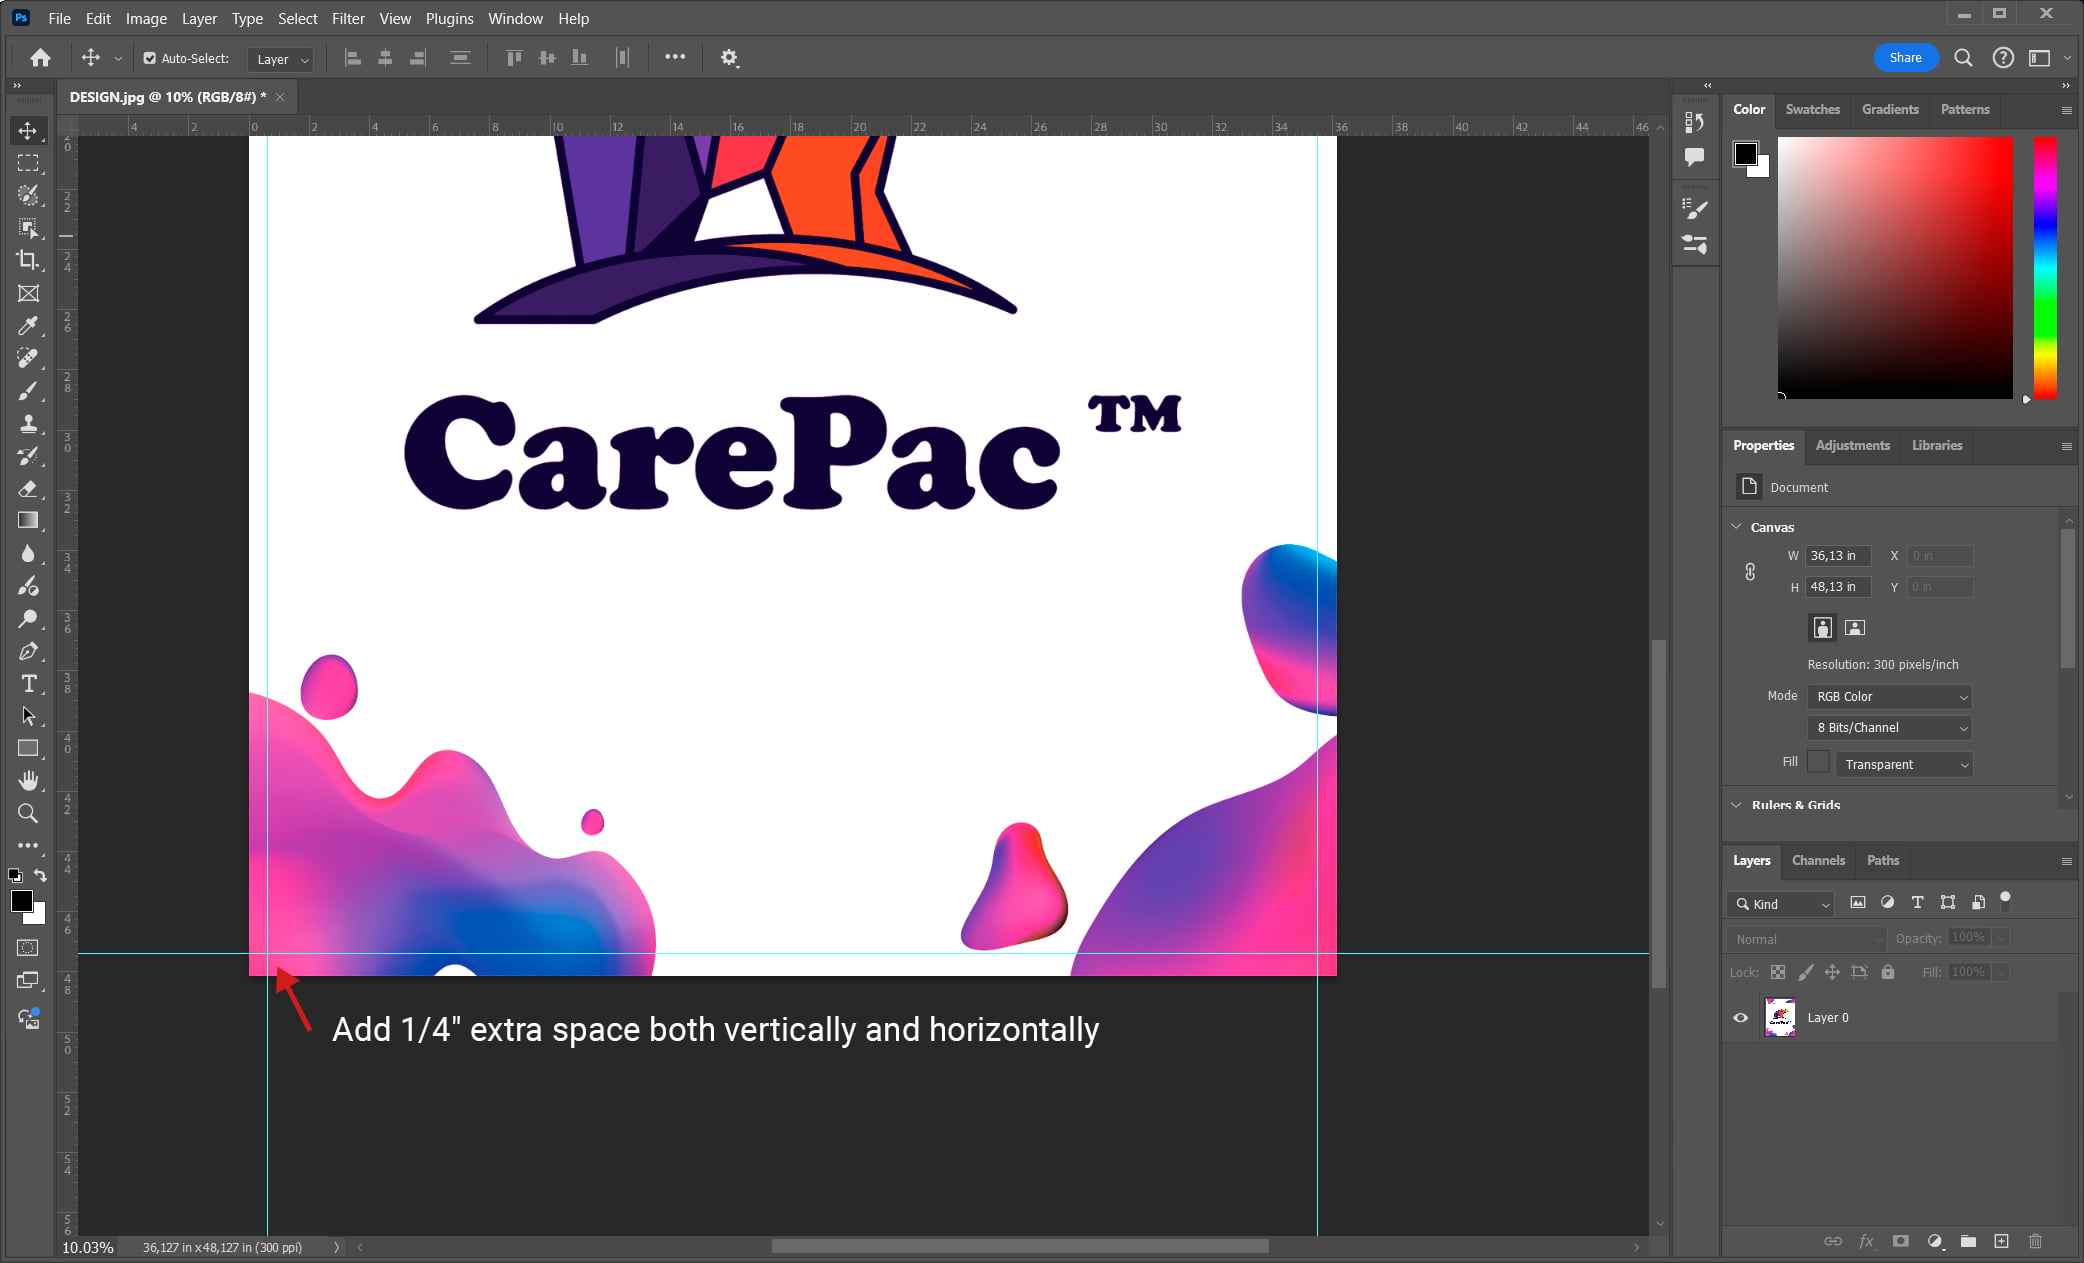
3. Set the Resolution at 300 PPI
4. Set the image Color Mode to CMYK

Adding a Bleed Trim Line in Illustrator
1. Open Illustrator and click File > New
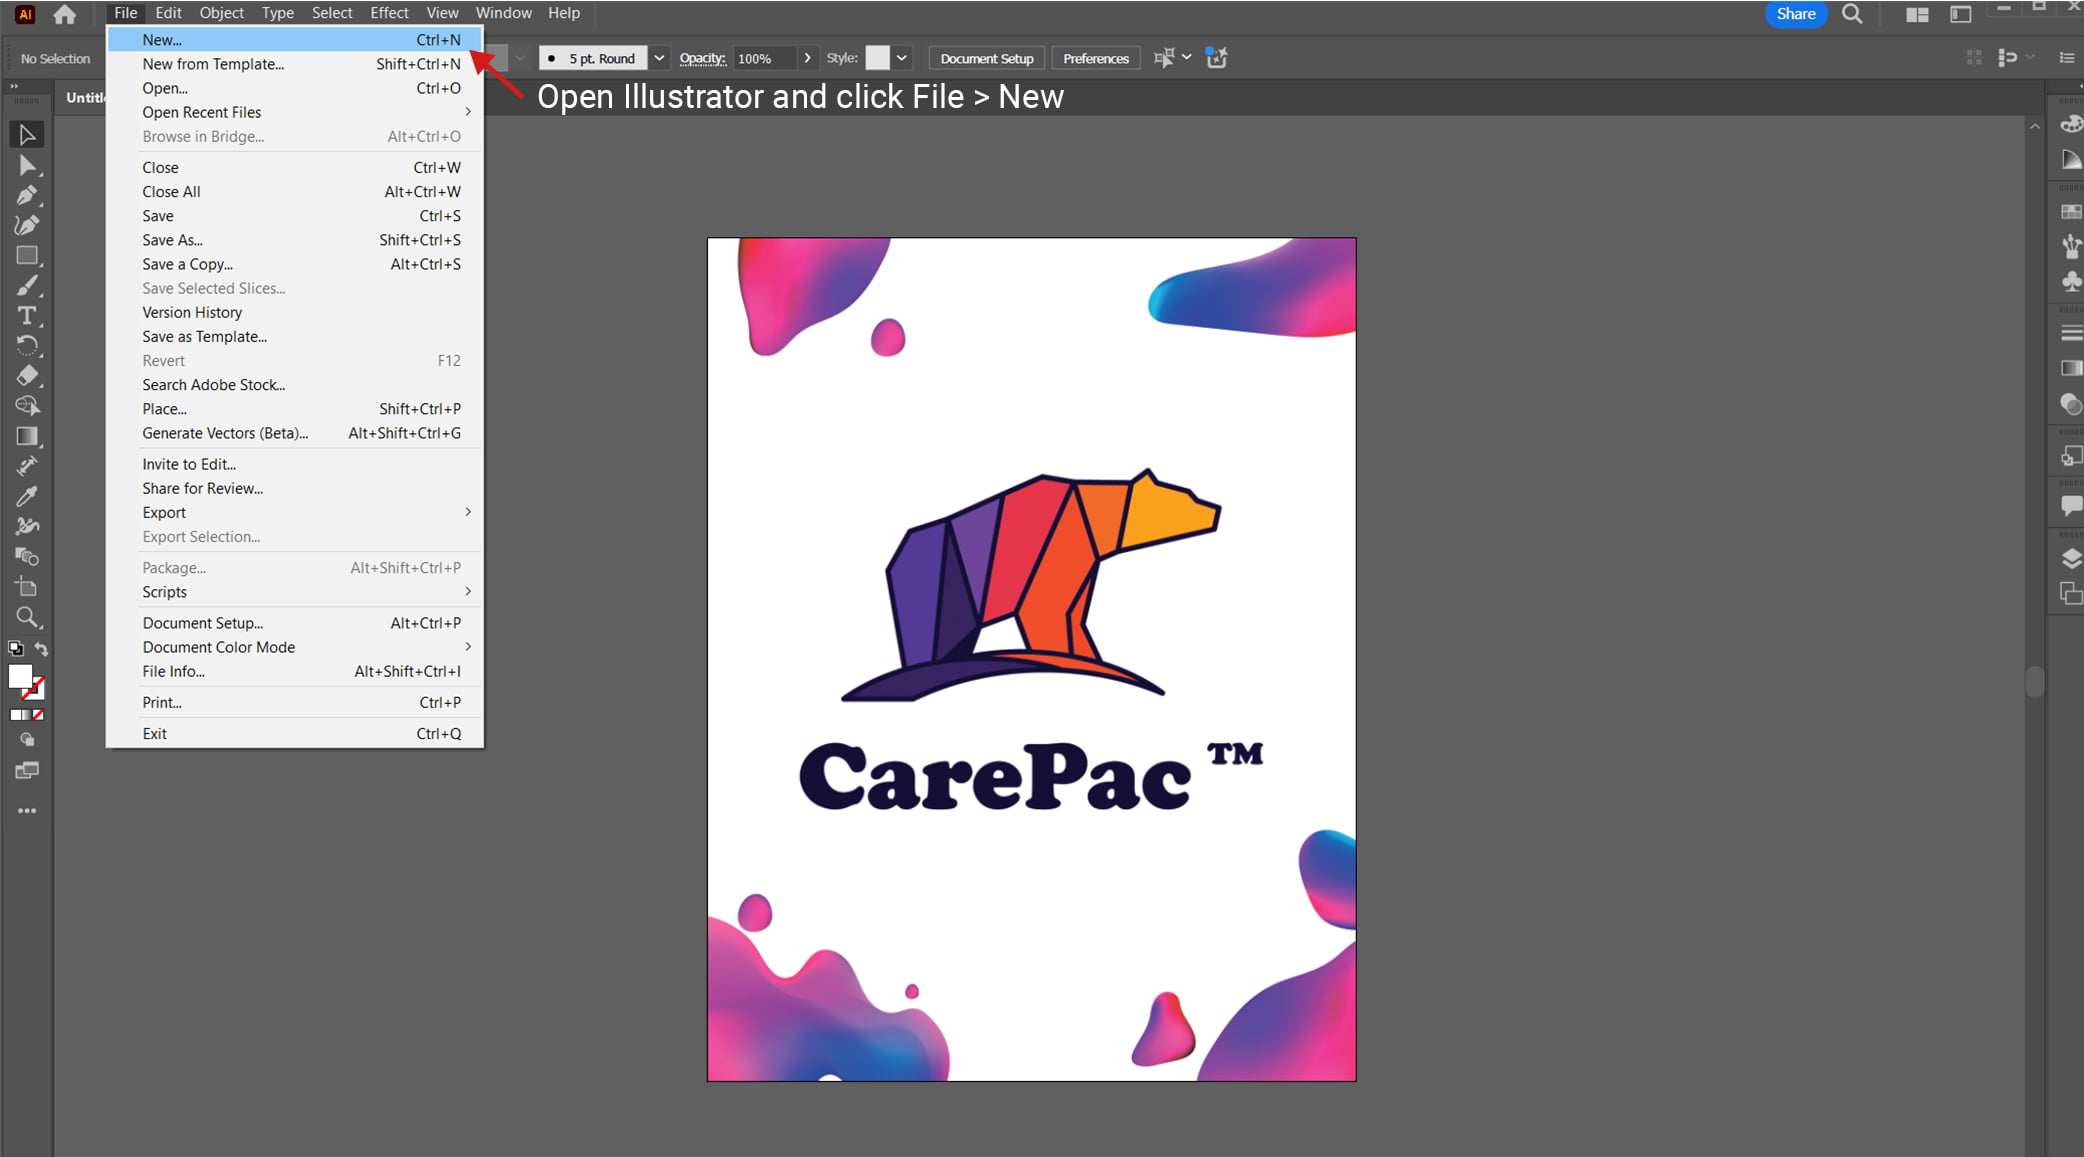
2. Enter the TRIM dimensions in the image width and image height boxes
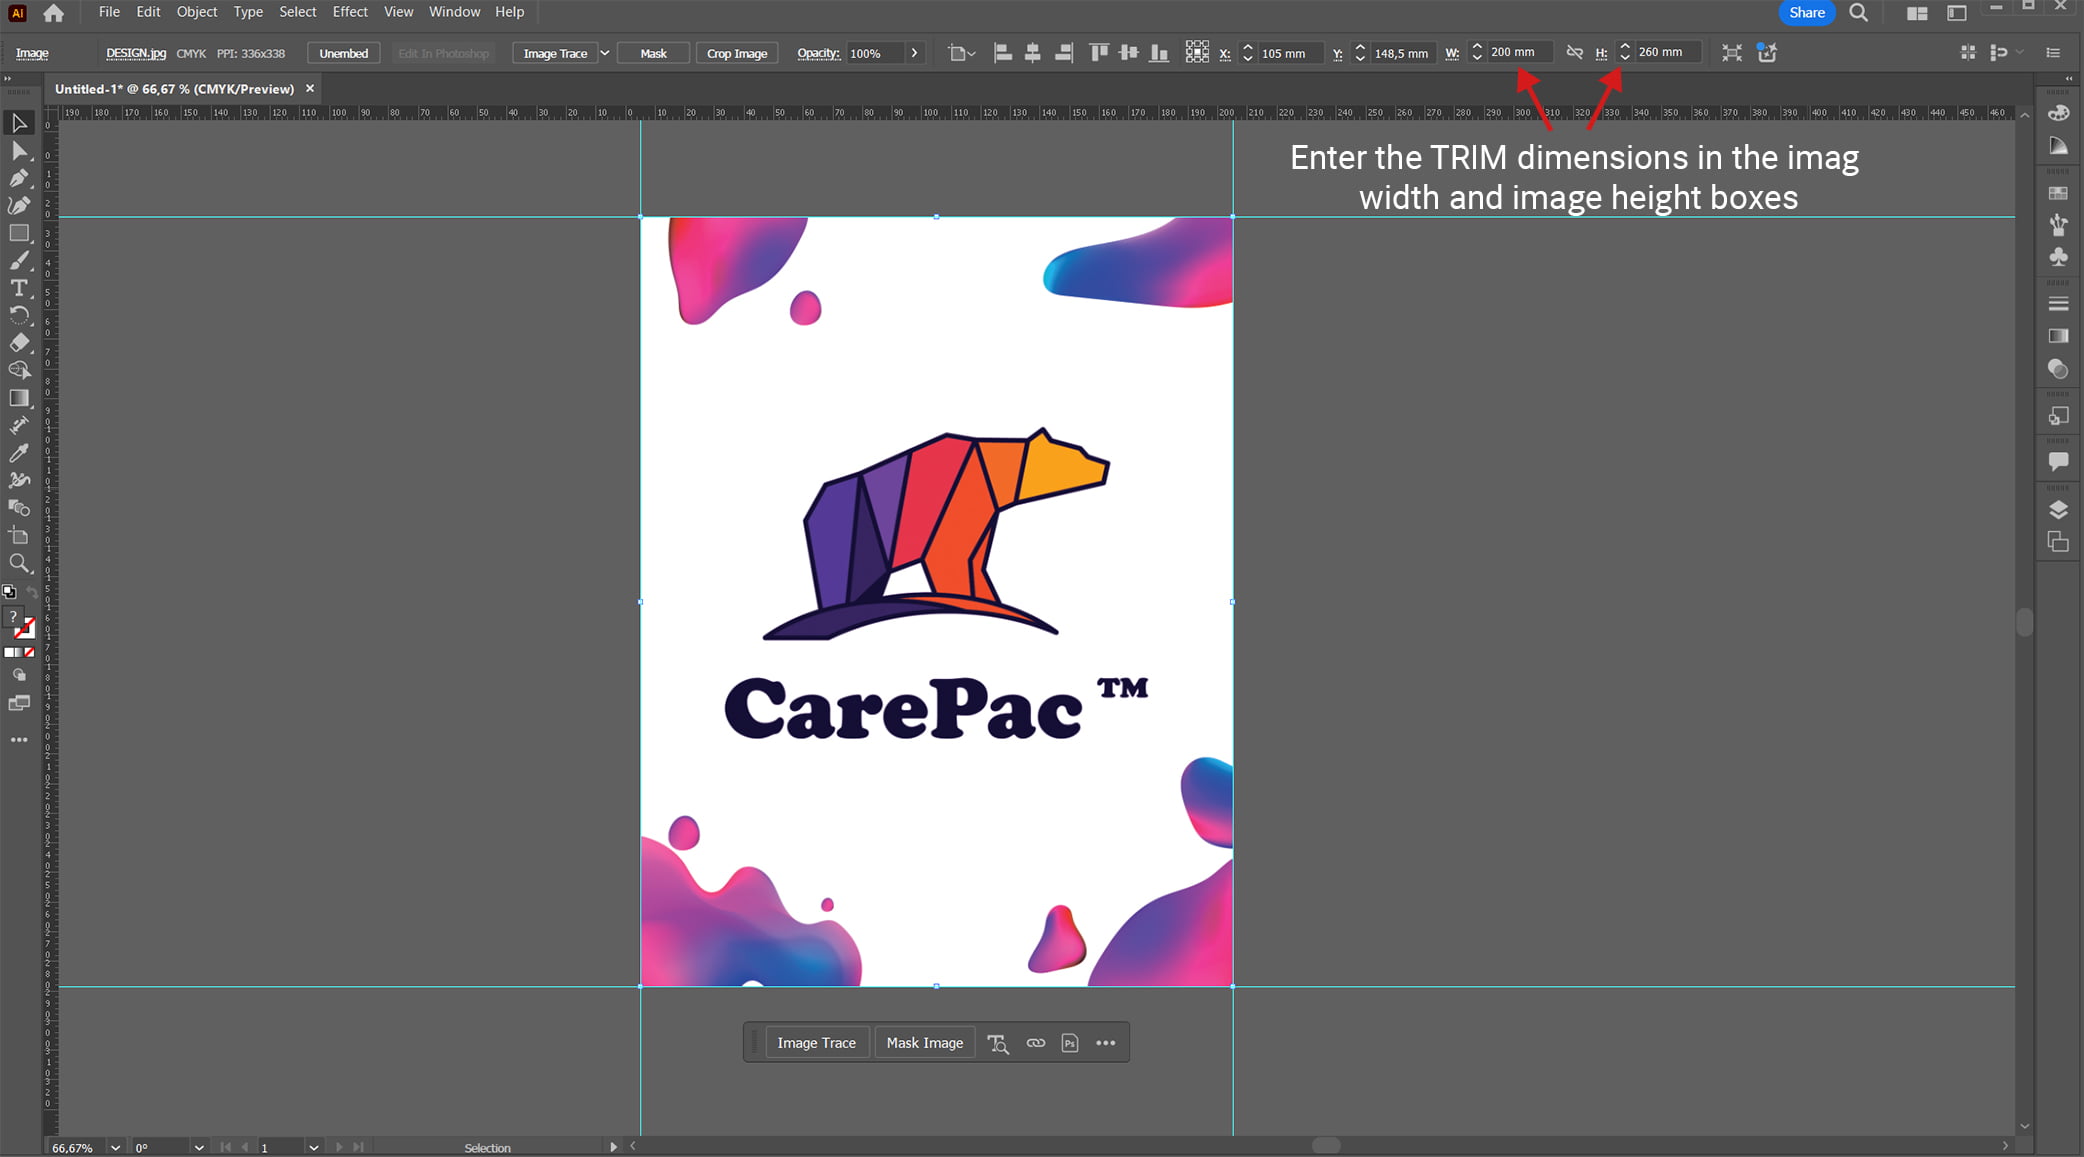
3. Enter 0.125 for the top, bottom, left and right bleed
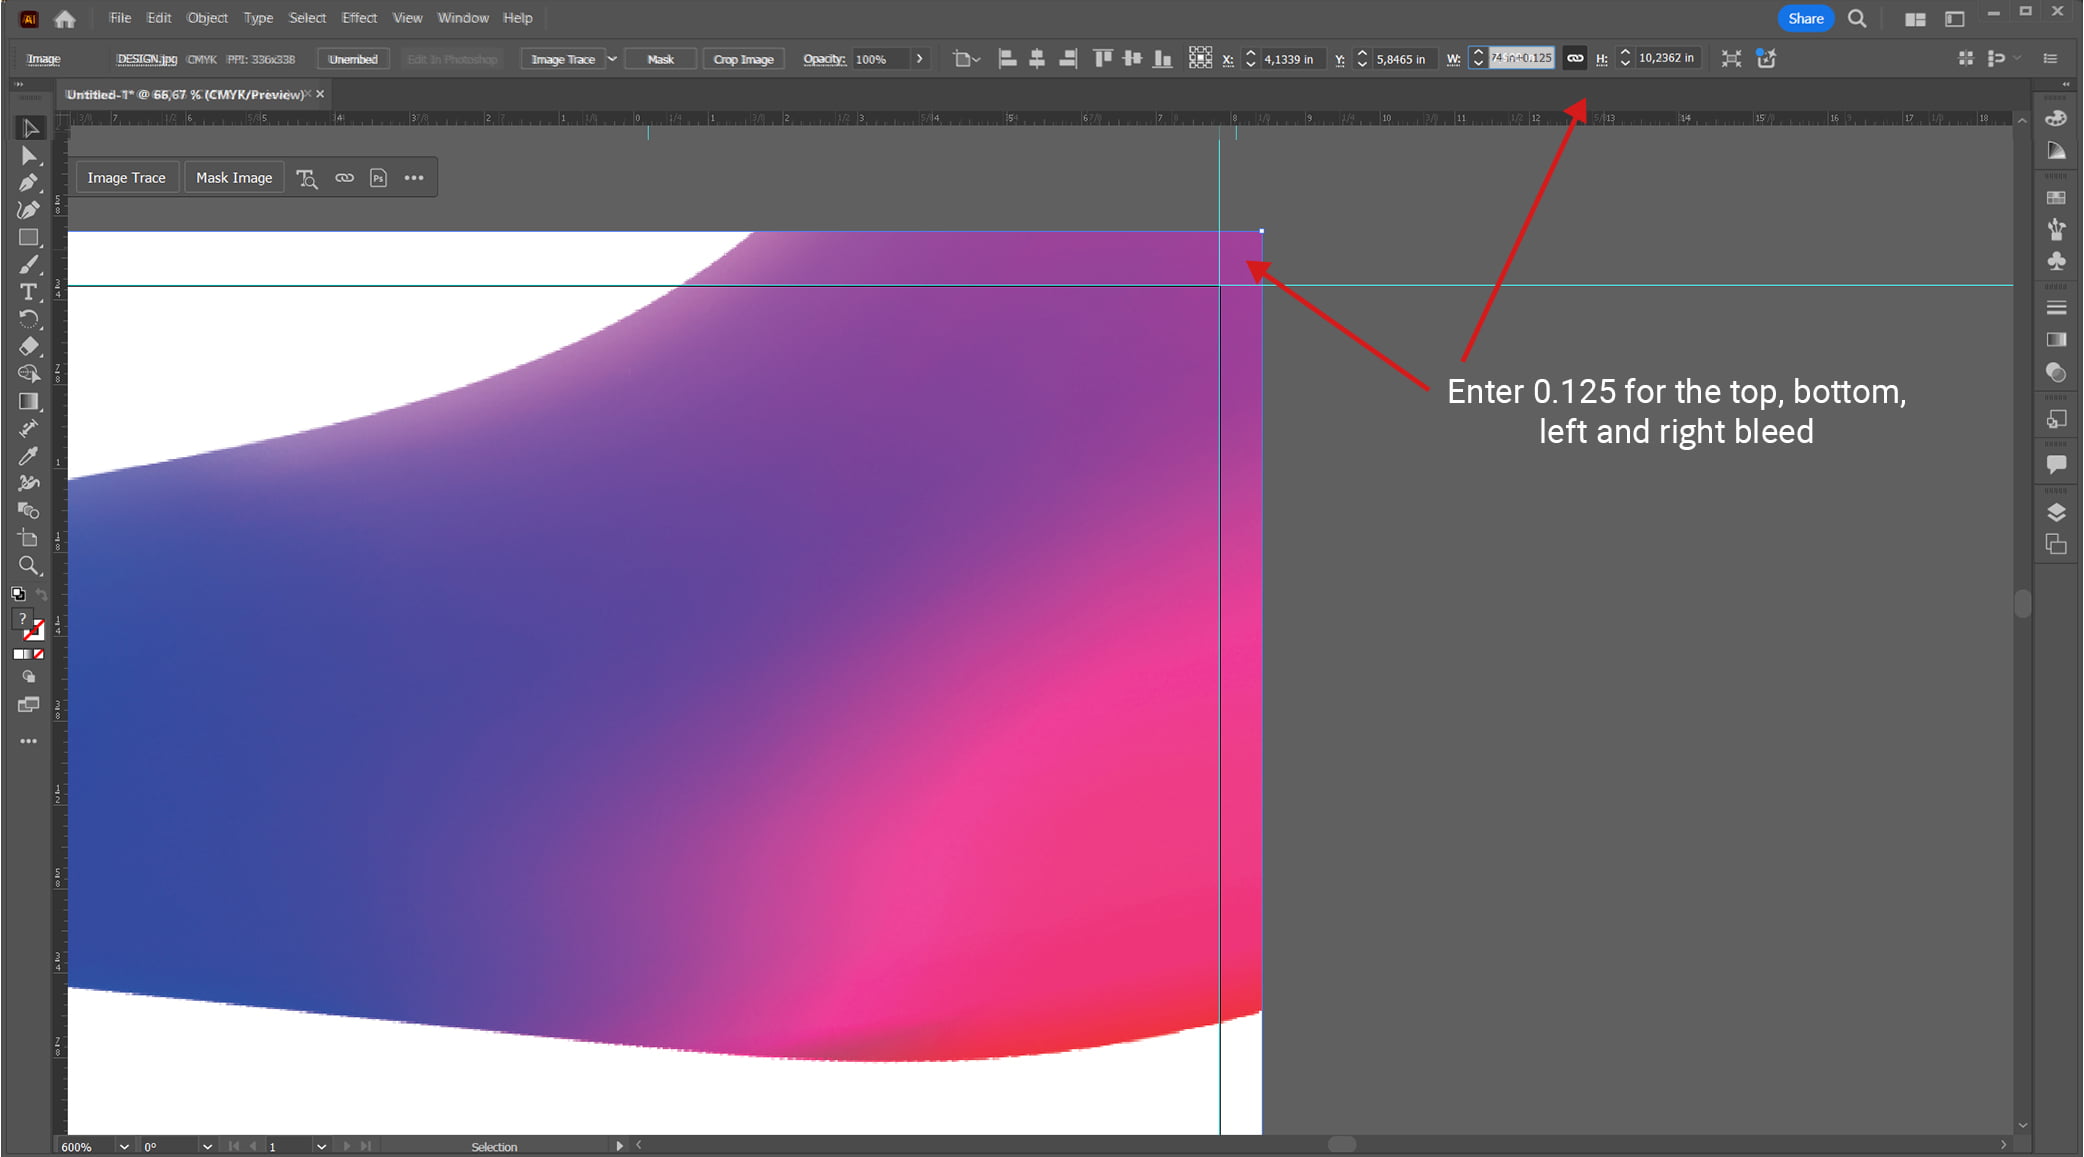
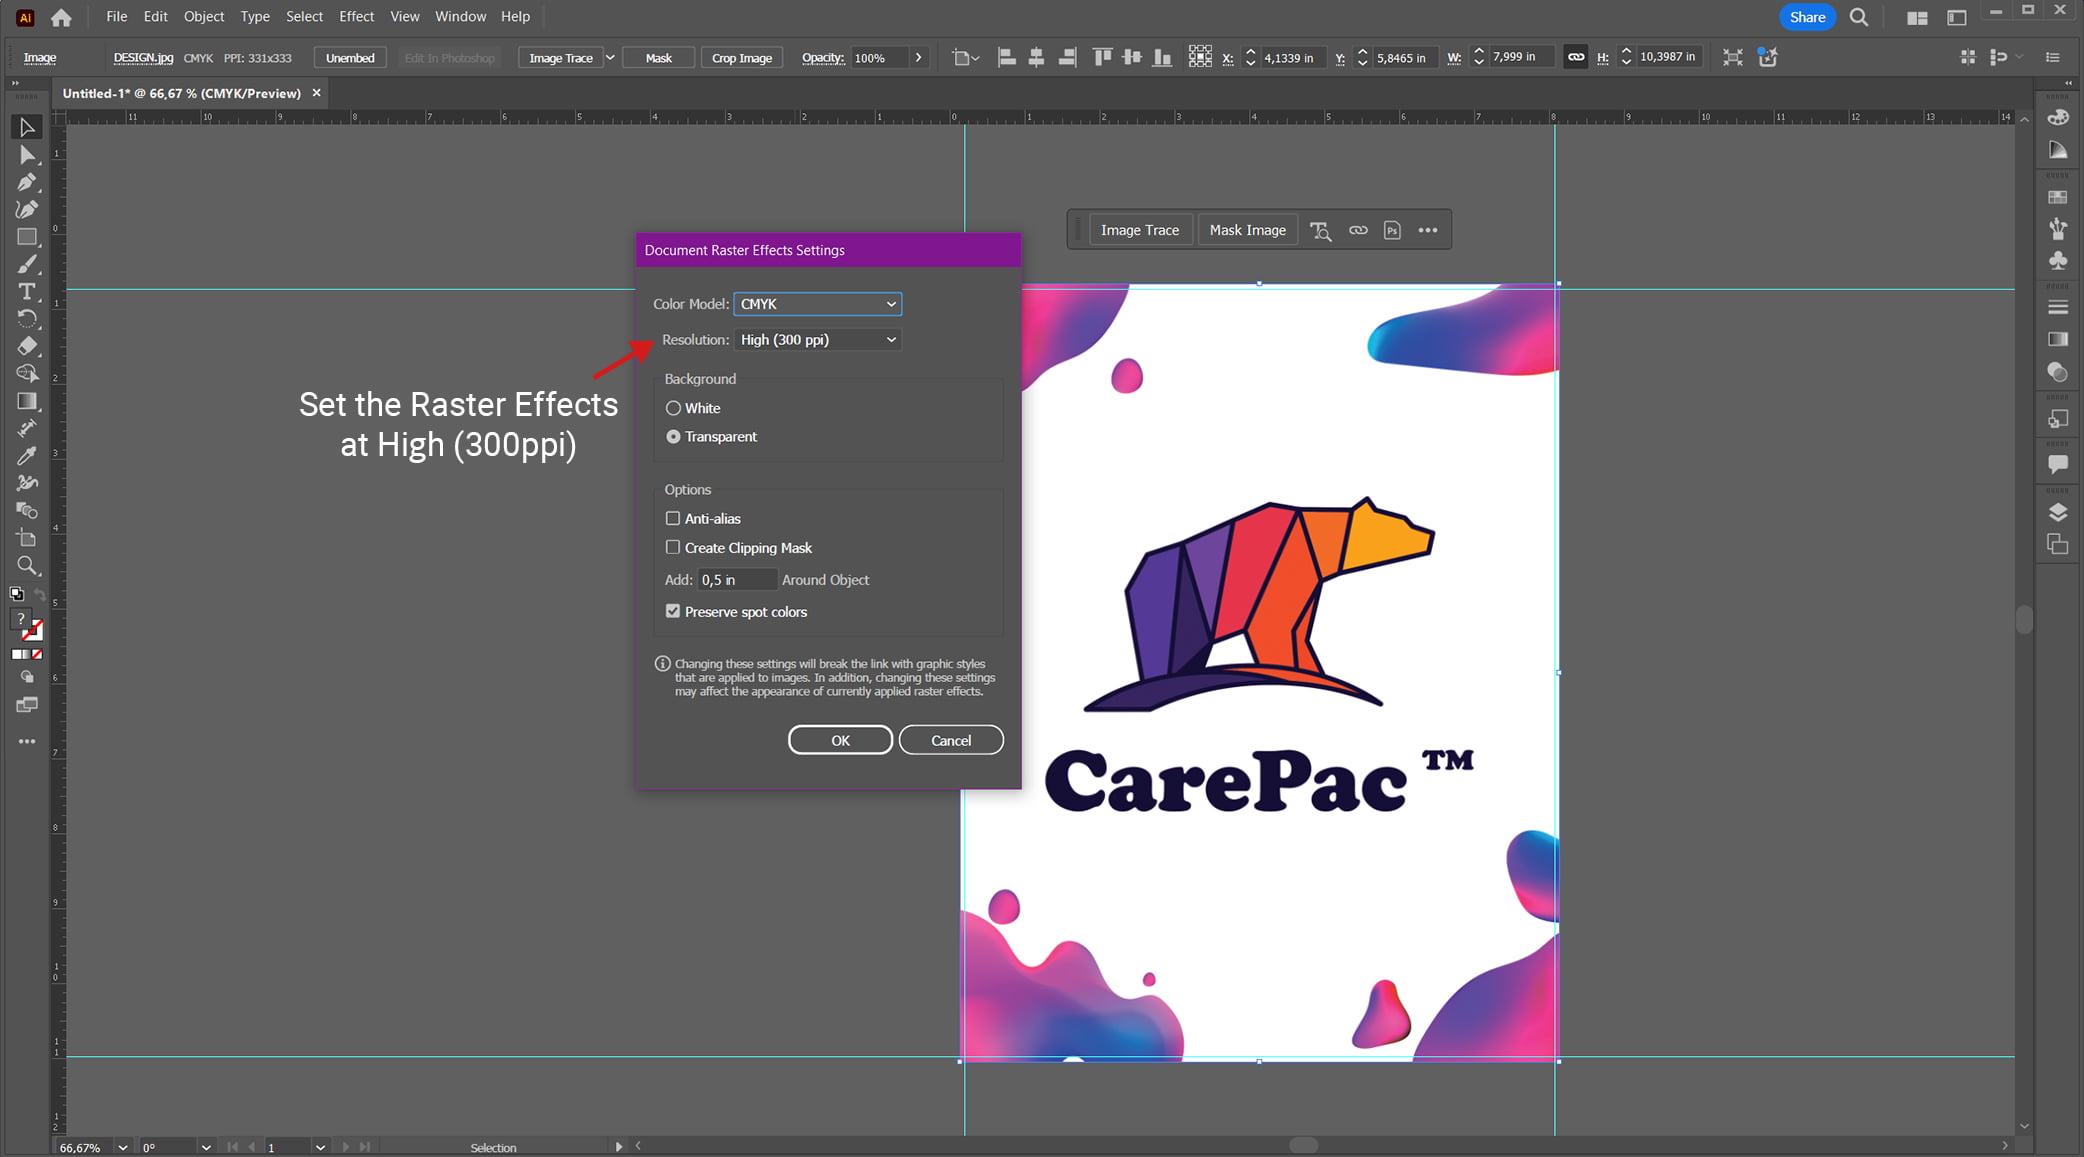
4. Set the the Color Mode to CMYK
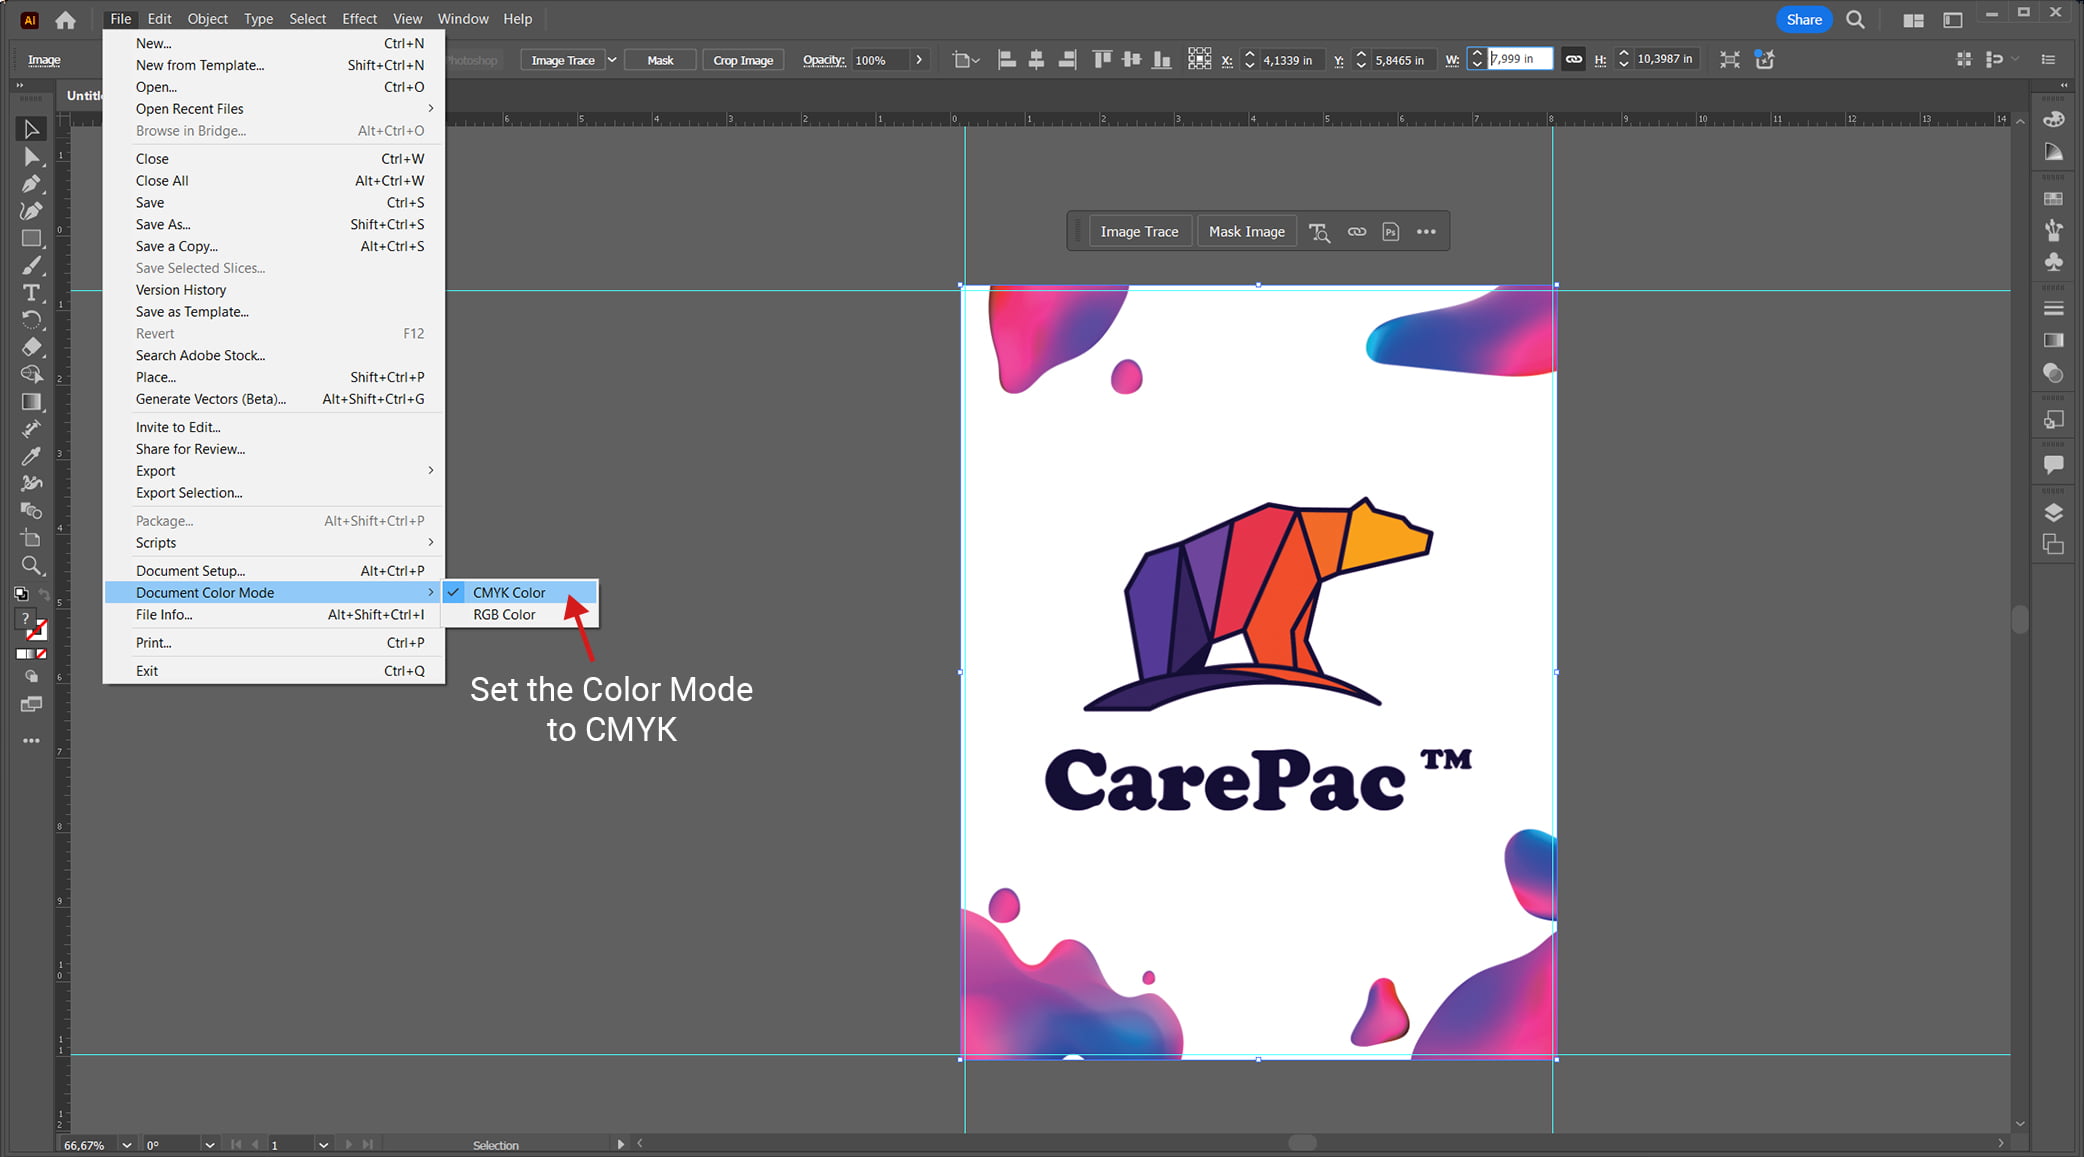
5. Set the Raster Effects at High (300ppi)
Adding a Bleed Trim Line in InDesign
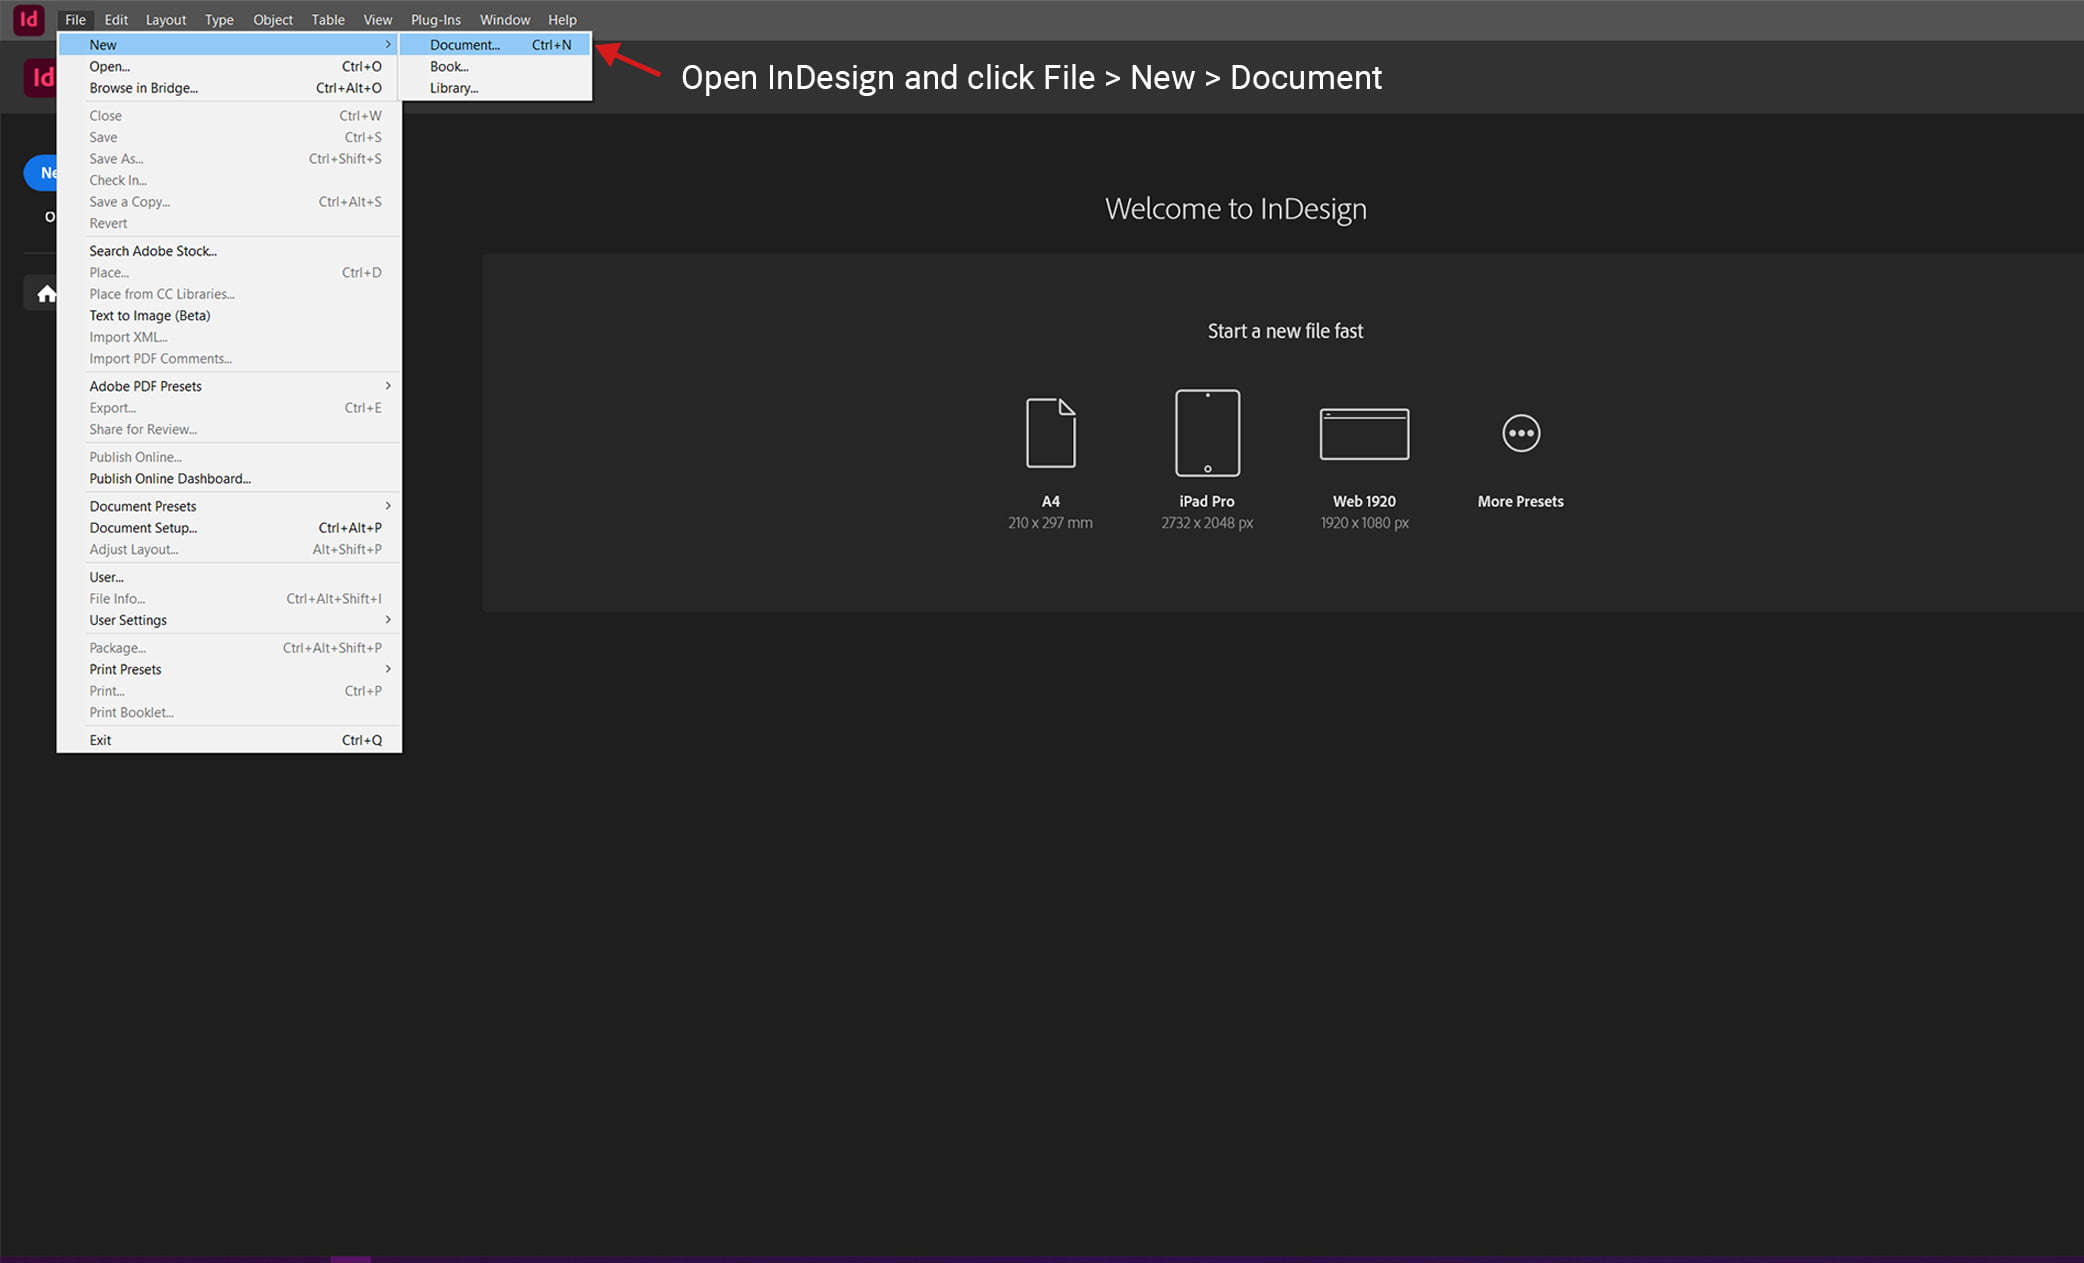
1. Open InDesign and click File > New > Document
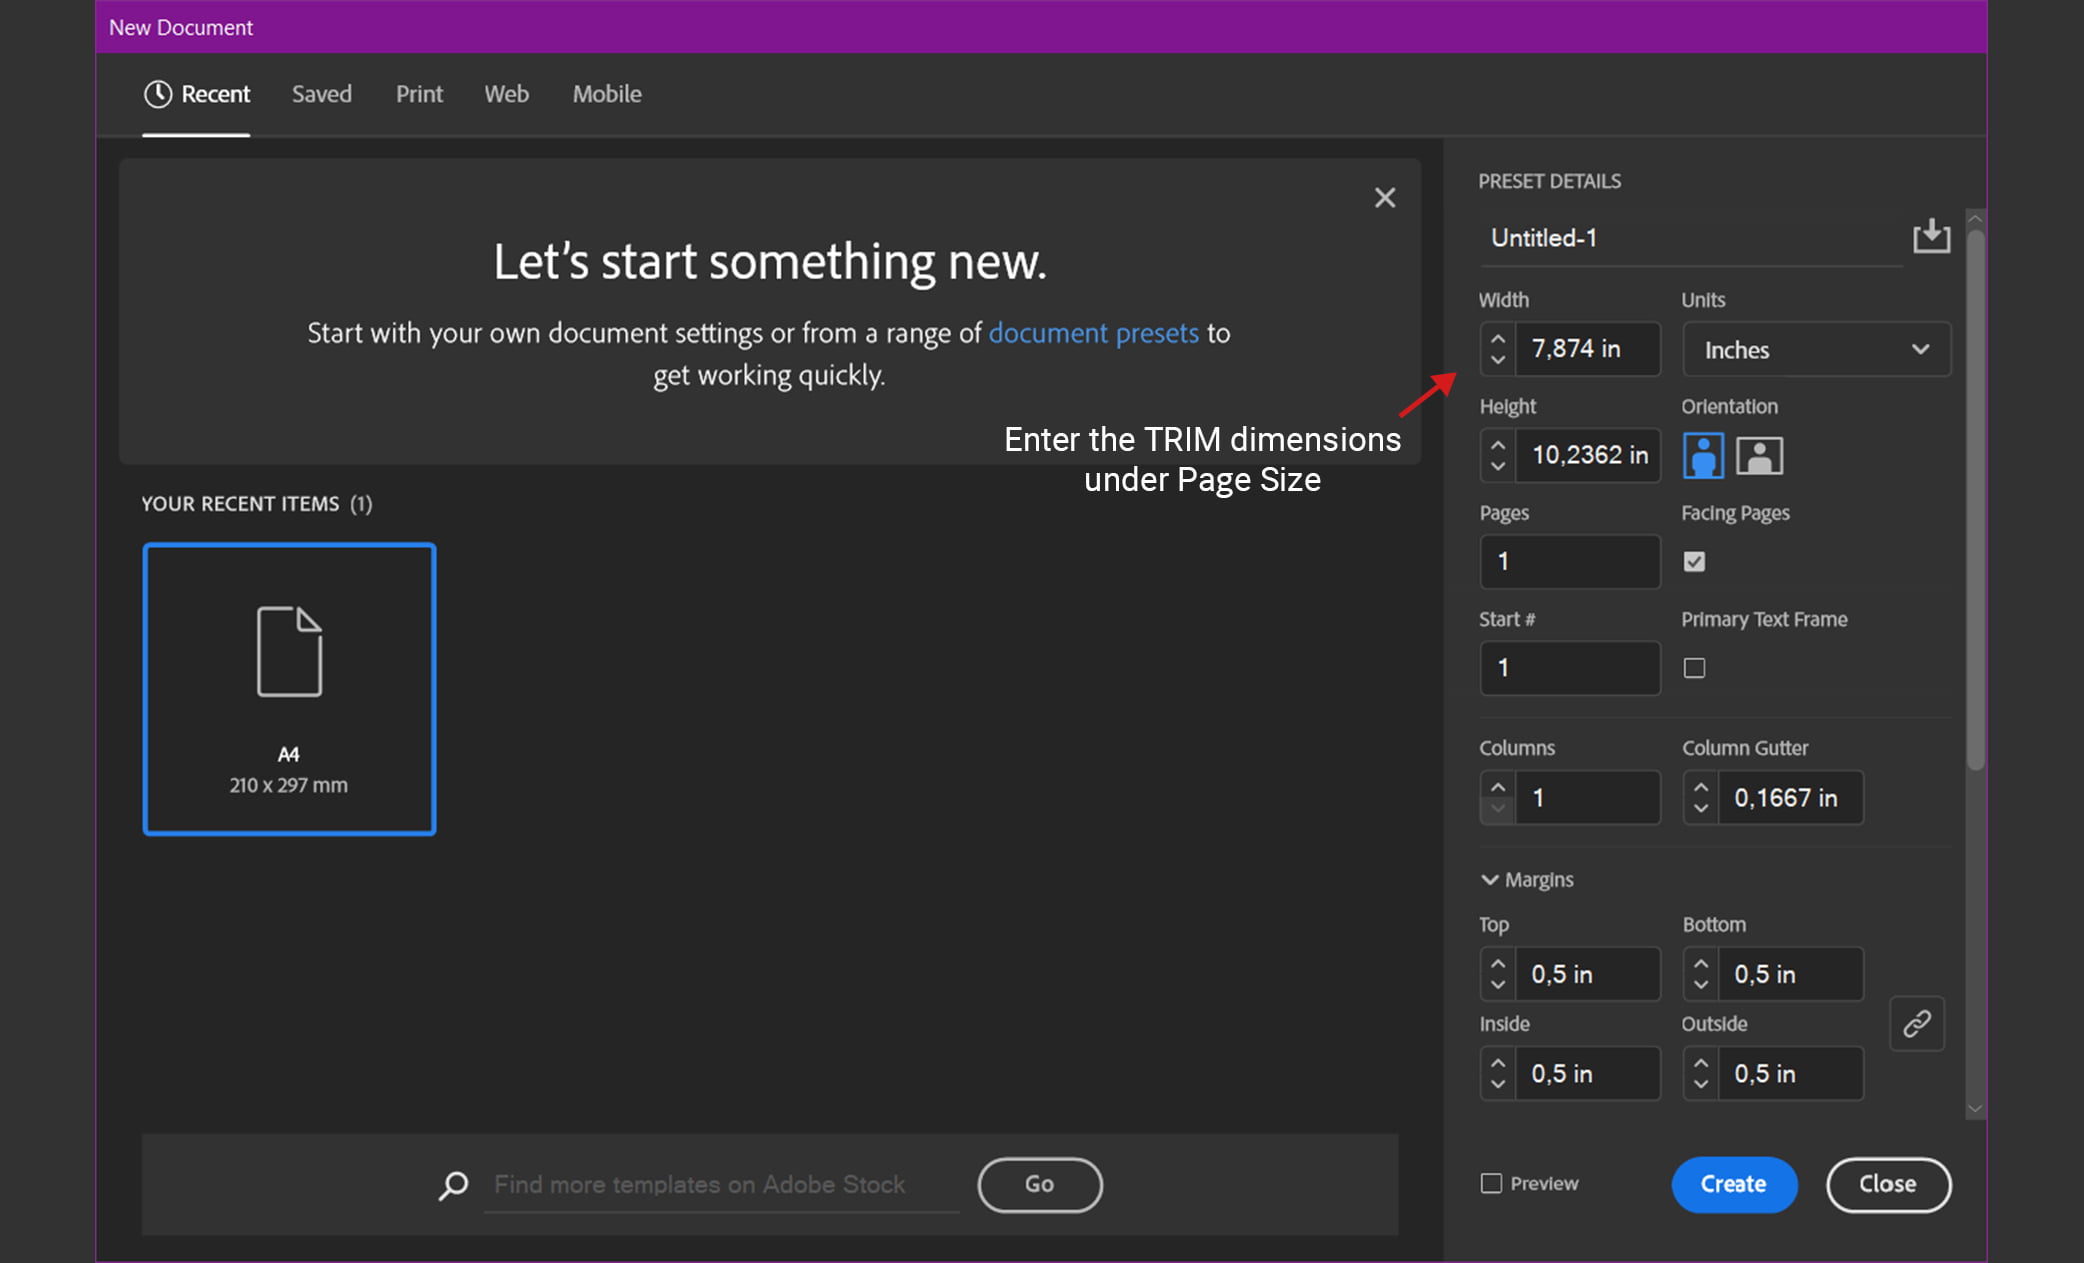
2. Enter the TRIM dimensions under Page Size
3. If you do not see "Bleed and Slug" at the bottom of the window, click the "More Options" button.
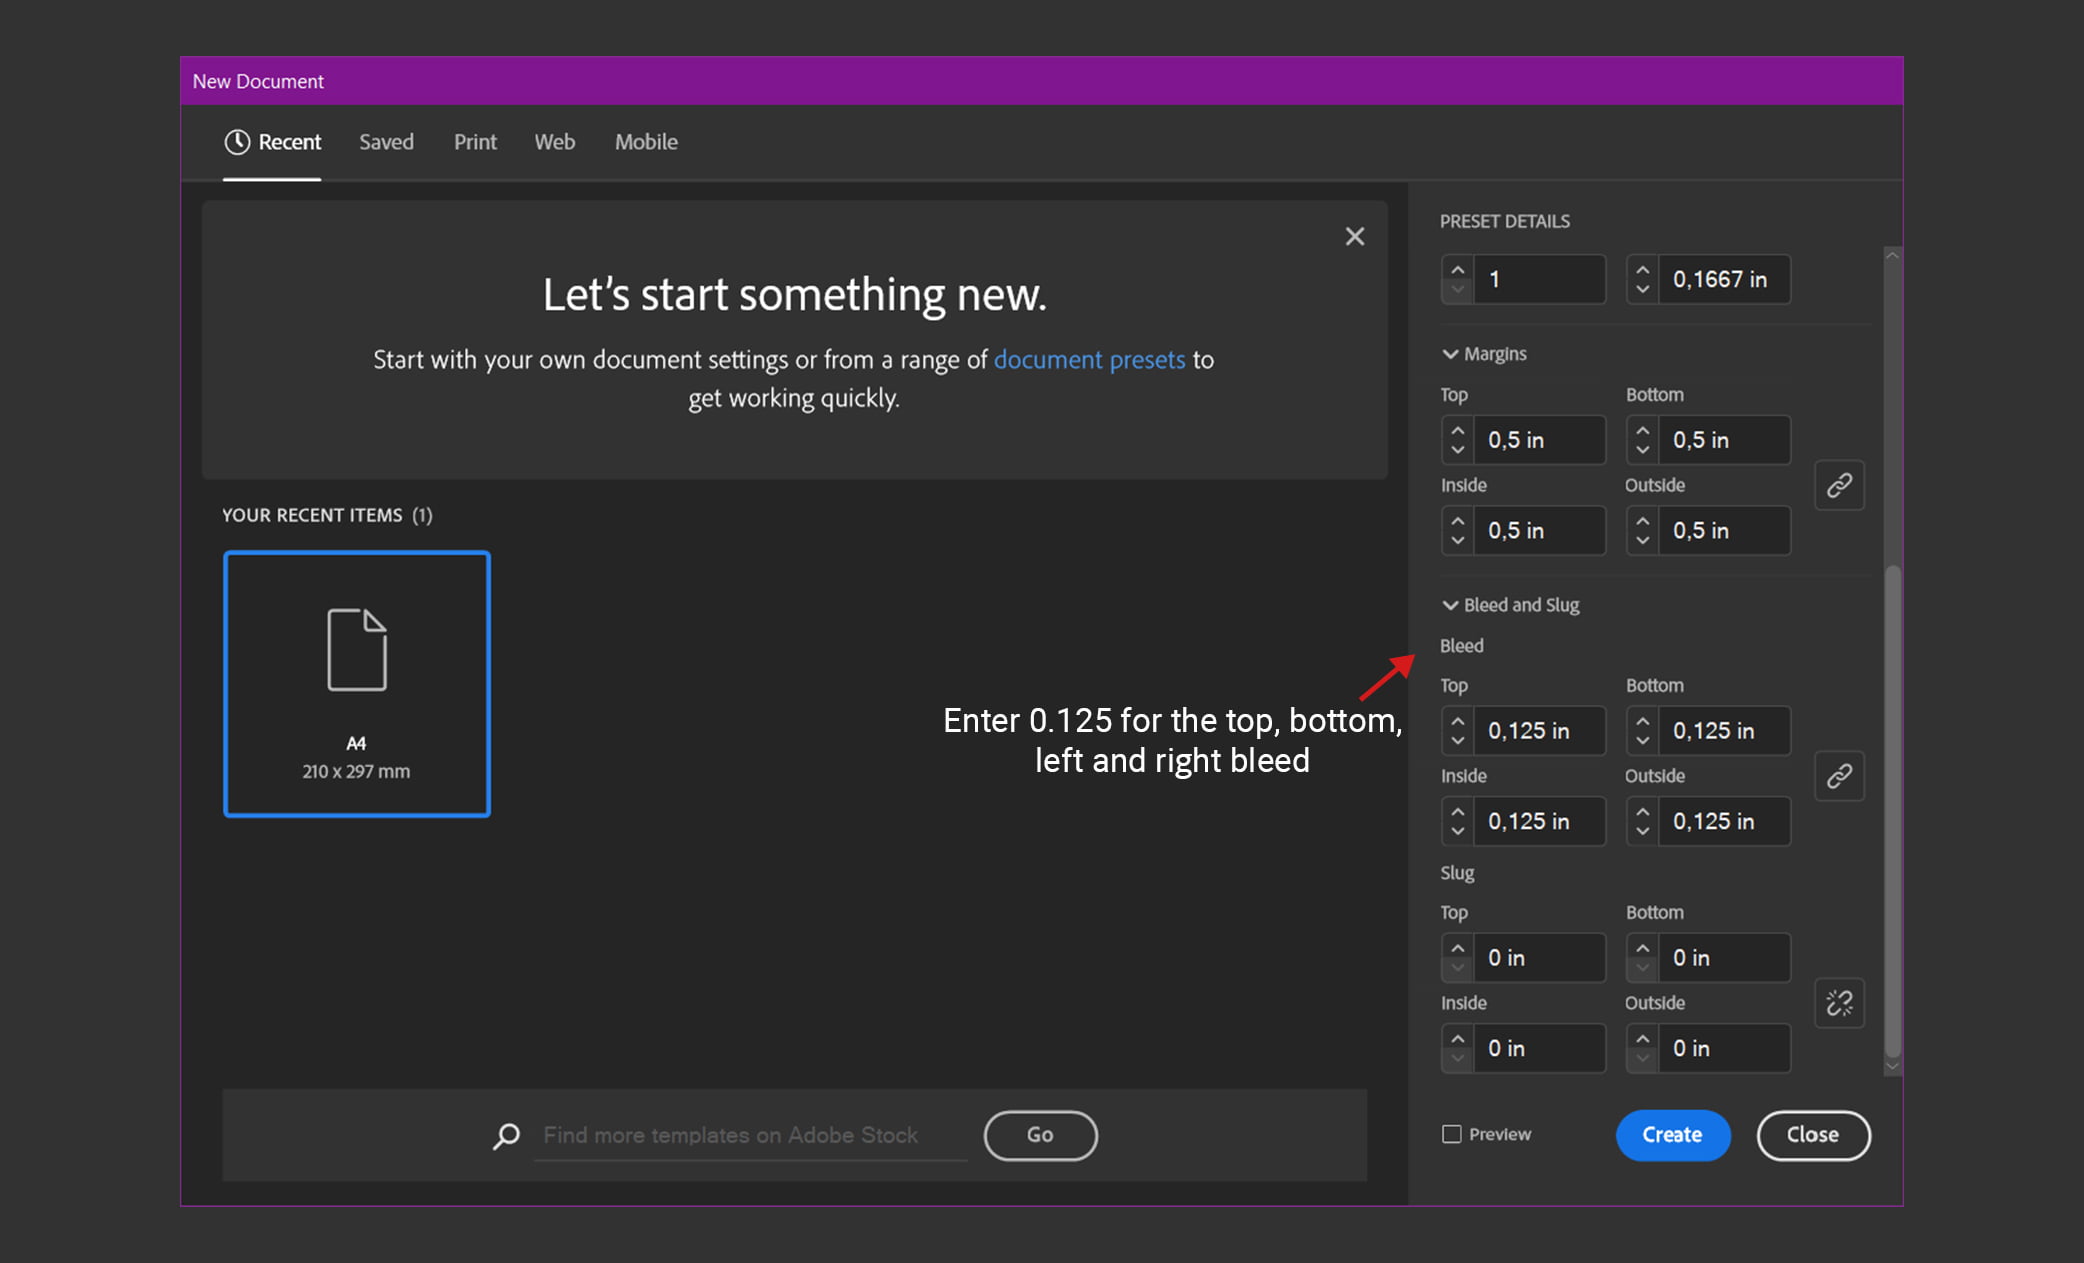
4. Enter 0.125 for the top, bottom, left and right bleed
Before saving any of the above files, make sure to double check the bleed area so that the final trim size and crop marks on the printed pieces will match the safety margin you have in mind.
Common Bleed Mistakes & Best Practices
It's common for first-timers to make mistakes when they try to add bleed margins to their finished product. See below for some common mistakes, followed by some best practices.
Here are some common mistakes to avoid:
- Adding a white border as the safety area -- avoid white, as this is what you're trying to circumvent.
- Putting critical text in the safety margin or full bleed area
- Expanding the file size to increase the printing dimensions
- Adding cut marks
And here are some best practices to keep in mind:
- Account for bleed line safety margins
- Extend the design dimension size to 1/8" on all sides to avoid unprinted edges
- Be careful during the cutting process to avoid cutting into your full bleed area
- Always work with professional printers and make sure to meet the specifications of your printer
CarePac’s Solutions for Flexible Packaging
Since we focus exclusively on custom flexible packaging solutions for a variety of industries and companies, we have exceptional customer service representatives who are committed to making sure your order is completed to perfection. We can walk you through the basics, or handle it all for you. Contact us today to get started on your next printing project.

